If you’re serious about your workouts, having a power rack at home is a game-changer. But what if you could make it even better without spending a fortune?
Imagine boosting your rack’s stability, adding clever attachments, or creating handy storage spots—all with simple DIY hacks. These easy tricks not only save you money but also tailor your setup perfectly to your needs. Ready to transform your power rack into the ultimate workout station?
Keep reading, because these DIY hacks will take your home gym to the next level.

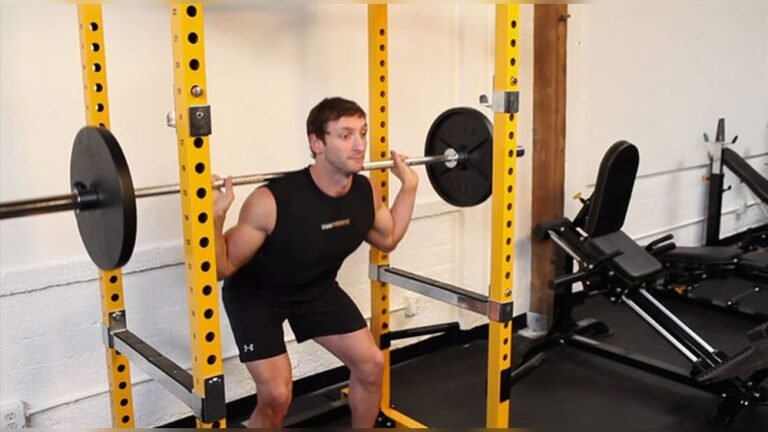
Credit: www.youtube.com
Enhancing Stability
Enhancing stability is crucial for a safe workout with your power rack. A stable rack prevents wobbling and ensures secure lifting. Small changes can greatly improve its steadiness. Focus on simple and effective solutions that keep the rack firmly in place. These tips help protect your floor and improve your workout experience.
Weight Anchoring Techniques
Use weight plates to add extra weight at the base of the rack. Stack plates on the rack’s bottom supports. Sandbags also work well to weigh down the frame. This method stops the rack from shifting during heavy lifts. Anchoring weights improve overall stability without drilling or permanent changes.
Using Anti-slip Mats
Place rubber mats under the power rack to reduce movement. Anti-slip mats prevent sliding on smooth floors. They also absorb shock and reduce noise. Thick mats create a firm grip between the rack and floor. This simple hack boosts stability and protects your flooring.
Floor Protection Options
Protect your floor with heavy-duty gym flooring or plywood sheets. Durable flooring materials prevent damage from dropped weights. Plywood spreads the load evenly and adds support. Floor protection keeps your workout area clean and stable. Choose materials that suit your floor type and budget.
Credit: www.azdiyguy.com
Cable Attachments
Adding cable attachments to your power rack expands workout options. Cables allow smooth, controlled movement for many exercises. They target muscles differently than free weights. This makes your power rack more versatile. Installing cable systems at home saves money on machines. Let’s explore the benefits, popular exercises, and a simple DIY pulley setup.
Benefits Of Cable Systems
Cable systems offer constant tension throughout each movement. This improves muscle engagement and control. They allow a wide range of motion and exercise variety. Cables reduce joint stress compared to some free weights. They are ideal for both beginners and advanced lifters. You can train multiple muscle groups with one setup. Cable attachments also keep workouts interesting and effective.
Popular Cable Exercises
Many exercises target different body parts using cables. Lat pulldowns work the back and shoulders. Tricep pushdowns focus on arm muscles. Cable rows strengthen the upper back and biceps. Face pulls improve shoulder health and posture. Cable curls build strong biceps with steady resistance. These exercises complement barbell training for balanced strength.
Diy Cable Pulley Setup
Building a cable pulley system is simple and affordable. Use a sturdy pulley wheel and strong rope or cable. Attach the pulley to the top or side of your power rack. Secure the rope with a handle or carabiner for attachments. Add weight plates or resistance bands for load. Test the system carefully before full use. This setup offers smooth cable movement for many exercises.
Safety Features
Safety is the top priority when using a power rack. Adding simple safety features can protect you during heavy lifts. These DIY hacks improve security without costing much. They help prevent accidents and give peace of mind while training.
Utility Pins And Safety Hooks
Utility pins and safety hooks hold the barbell securely in place. You can make them with strong metal rods or repurpose old bike spokes. Slide them into the rack holes to catch the barbell if you fail a lift. This stops the bar from falling on you or the floor.
Choose pins that fit your rack holes tightly. Paint them bright colors to spot easily. Make sure they lock firmly and can support heavy weight.
Barbell Safety Pads
Barbell safety pads cushion the bar and protect your shoulders and neck. You can use foam pipe insulation or dense yoga mats cut to size. Wrap the padding around the barbell and secure it with tape or Velcro strips.
These pads reduce bruises and discomfort. They also prevent the bar from slipping during squats or lunges. Change or clean them often to keep fresh and safe.
Magnet And Magnetic Tape Hacks
Magnets and magnetic tape help organize weights and accessories on your power rack. Attach magnetic strips to the rack frame to hold collars, clips, or small tools. Use strong magnets to keep metal items handy and off the floor.
This hack saves space and reduces clutter around your rack. It also stops you from bending or reaching for equipment mid-workout. Test magnet strength before use to avoid dropping heavy items.

Credit: www.youtube.com
Diy Rack Accessories
DIY rack accessories improve your power rack’s function and convenience. Simple upgrades make workouts smoother and more efficient. These additions save money and customize your gym space.
Building your own accessories allows control over design and materials. You can tailor them to fit your specific needs and rack model.
Band Pegs Installation
Band pegs add resistance bands to your power rack for varied exercises. Install metal pipes or sturdy rods on the rack’s frame. Secure them with bolts or clamps for safety.
Place pegs near the base or sides for easy band attachment. This setup helps with warm-ups, stretching, and strength training.
Weightlifting Chains
Weightlifting chains increase lifting difficulty by adding progressive load. Hang chains from the barbell using carabiners or hooks. DIY hooks made from metal scraps work well too.
Chains also protect the floor by reducing bar bounce. Adjust chain length for different exercise styles and weights.
Drink Holder And Storage Solutions
Keep water and gear close by adding a drink holder to your rack. Use PVC pipes or small baskets fixed with brackets or zip ties. This keeps hydration within reach during workouts.
Create storage hooks for bands, belts, and gloves. Attach sturdy hooks or pegs to rack posts. Organizing your gear saves time and keeps the space tidy.
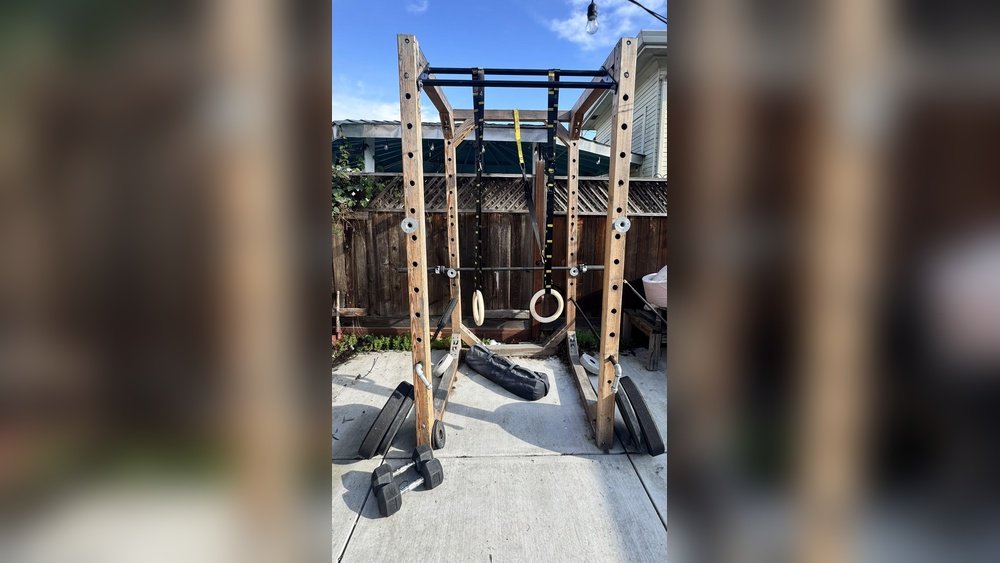
Customizing With Wood
Customizing your power rack with wood offers a warm, natural look and solid functionality. Wood is easy to work with and can be shaped to fit your specific needs. This approach lets you blend gym equipment with home decor seamlessly. Wooden power racks can be sturdy and visually appealing. They provide a cost-effective alternative to metal racks.
Building your own wooden power rack adds a personal touch. It also gives you control over dimensions and features. Wood allows for easy modifications and repairs. Plus, it is widely available and affordable. Custom wood racks can be tailored to fit small spaces perfectly.
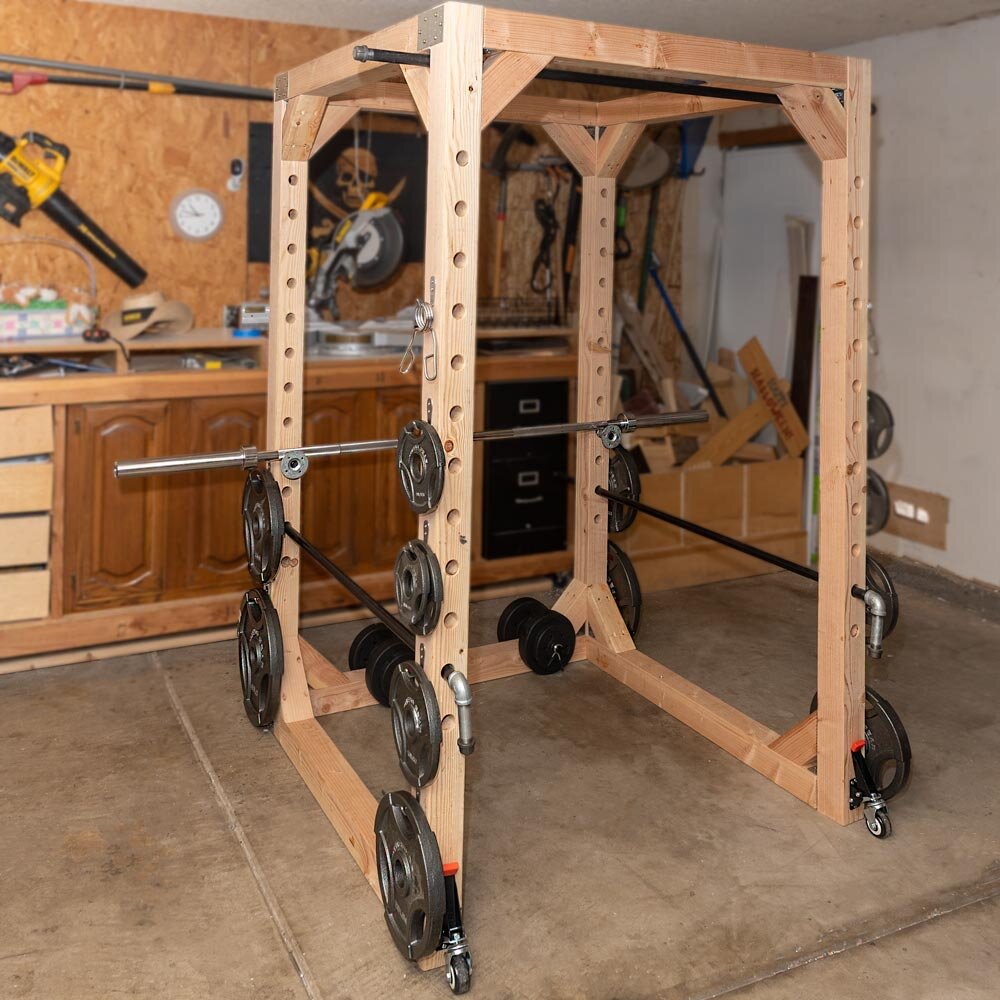
Building Wooden Power Racks
Start by selecting strong, durable wood like oak or maple. Use thick beams to ensure stability during heavy lifts. Plan your design with safety in mind. Make sure the rack can support the maximum weight you intend to lift. Pre-drill holes for bolts to avoid splitting the wood. Sand all surfaces to prevent splinters and rough edges. Finish with a protective sealant to extend the rack’s life.
Wooden Squat Rack Plans
Simple squat rack plans use basic cuts and joinery. Most designs include uprights, crossbeams, and base supports. Include adjustable hooks or pegs for barbell placement. Plans often suggest using metal brackets for extra strength. Keep measurements precise to ensure stability. Many free plans are available online for reference. Modify plans to suit your height and lifting style.
Common Wood Rack Challenges
Wood can warp or crack under heavy use or moisture. Avoid placing the rack in damp areas. Bolts can loosen over time; check them regularly. Wood racks may require extra reinforcement for very heavy weights. Protect the wood from sweat and cleaning chemicals. Consider adding rubber padding to bar hooks to reduce wear. Despite challenges, wood remains a practical option for many home gyms.
Flooring Solutions
Choosing the right flooring for your power rack is crucial. It protects your floor and improves workout safety. Good flooring absorbs impact and reduces noise. It also keeps your power rack stable during heavy lifts. Here are some practical flooring solutions for your home gym.
Rubber Mat Benefits
Rubber mats are popular for home gyms. They cushion heavy weights and lessen floor damage. These mats also prevent slipping, which improves safety. They are easy to clean and last a long time. Rubber mats keep your power rack steady during workouts.
Creating Drop Zones
Drop zones protect your floor from heavy drops. Use thick mats or layered rubber tiles to create these areas. Drop zones reduce noise and damage from falling weights. They make lifting safer and more comfortable. Mark the zone clearly to keep your workout space organized.
Cost-effective Flooring Ideas
Affordable flooring options include foam tiles and recycled rubber mats. Foam tiles are soft and easy to install. Recycled rubber mats offer good protection at a lower price. Pallet wood with rubber layers can work as a DIY platform. These ideas save money without losing quality.
Space Optimization
Optimizing space is essential for any home gym, especially with a power rack. Many users face limited room yet want full functionality. Smart design and clever hacks help keep your workout area neat and efficient. Space optimization not only saves room but also improves workout flow and safety.
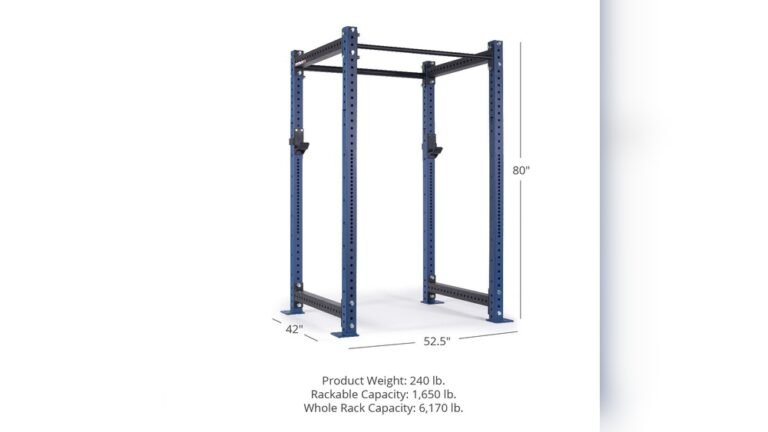
Compact Power Rack Designs
Choosing a compact power rack design saves valuable floor space. Look for racks with smaller footprints or foldable features. These racks fit into tight corners or against walls without crowding the room. Minimalist designs focus on essential parts to reduce bulk. Compact racks still support heavy lifting and essential exercises.
Multi-use Attachments
Multi-use attachments increase your power rack’s functionality without extra equipment. Attach pull-up bars, dip handles, or landmine rigs to your rack. Some racks support cable systems for varied workouts. Using multi-use parts reduces the need for separate machines. This keeps your gym organized and space-efficient.
Organizing Your Home Gym
Organize your gym tools around your power rack to maximize space. Use wall-mounted racks or pegboards for weights and accessories. Store barbells vertically to save floor space. Keep smaller items like resistance bands and collars in bins or hooks on the rack. A tidy gym area makes workouts safer and more enjoyable.
Heavy Lifting Without A Rack
Lifting heavy weights without a power rack needs smart techniques and safety. A power rack gives support and safety stops during squats and presses. Without it, you need to adjust your workout carefully. You can still build strength and muscle with simple hacks and methods.
Using alternative squatting techniques can help you lift heavy while reducing injury risk. These methods require less equipment but still target your muscles well. Safety is the top priority when lifting without a rack. Proper form and cautious weight choices keep you safe during your sessions.
Alternative Squatting Techniques
Try goblet squats using a dumbbell or kettlebell held close to your chest. This keeps your balance and controls the weight well. Front squats with a barbell held in front also reduce the need for a rack. Bulgarian split squats work one leg at a time and build strong legs without heavy bars. Step-ups on a bench or box add variety and target similar muscles safely. These exercises improve strength and stability without needing a power rack.
Safety Tips For No-rack Lifts
Always warm up before lifting heavy weights to prepare your muscles and joints. Use a spotter if possible to help you if you lose control. Start with lighter weights and increase slowly to avoid injury. Keep good form by controlling your movement and avoiding sudden jerks. Use sturdy, flat surfaces to prevent slipping or tripping. Clear the area around you to avoid accidents. Never lift heavy weights alone if you are unsure about the lift. These safety steps protect you when working out without a power rack.
Frequently Asked Questions
How To Make A Power Rack More Stable?
Anchor the power rack by adding weight plates or sandbags to its base. Use rubber mats underneath to prevent slipping and reduce movement. Secure the rack to the floor with bolts if possible. Cross braces and tight bolts also enhance stability.
Can You Add Cables To A Power Rack?
Yes, you can add cables to a power rack using cable attachments. This enhances exercise variety like rows and pulldowns.
How To Squat Heavy Without A Rack?
Use a heavy-duty barbell collar to secure weights. Perform front squats or goblet squats. Use a sandbag or dumbbells for added resistance. Practice proper form and controlled depth to avoid injury. Always warm up and consider a spotter for safety.
What To Put Under A Power Rack?
Place thick rubber mats or gym flooring under a power rack to protect floors, reduce noise, and prevent slipping. Dense mats ensure stability and durability during heavy lifts.
Conclusion
DIY hacks can make your power rack safer and more useful. Simple additions improve stability and protect your floor. Small changes like adding hooks or holders save space. Custom attachments let you try more exercises at home. These tips help you build a gym that fits your needs.
Keep experimenting and adjusting for the best workout setup. Your power rack can become a versatile, strong centerpiece in your home gym.
I am a certified fitness coach with over 10 years of experience helping people improve their strength, endurance, and overall health. Specializes in workout programming, weight training, fat loss, muscle building, home fitness, and evidence-based nutrition.My goal is to make fitness simple and practical through well-researched guides, honest product reviews, and actionable training advice.