If you want to build stronger, more defined chest, shoulders, and triceps, mastering the dip station is a game-changer for your workouts. But how do you use this powerful piece of equipment correctly to get the best results without risking injury?
This usage guide will walk you through everything you need to know—from proper form and common mistakes to tips that help you progress safely and effectively. Whether you’re a beginner or looking to level up your routine, understanding how to use the dip station will unlock new strength gains and transform your upper body.
Keep reading to discover how to make every dip count and reach your fitness goals faster.

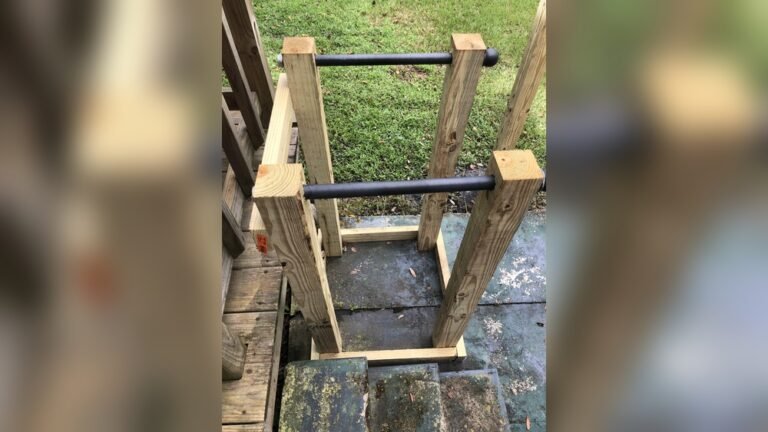
Credit: manuals.plus
Dip Station Setup
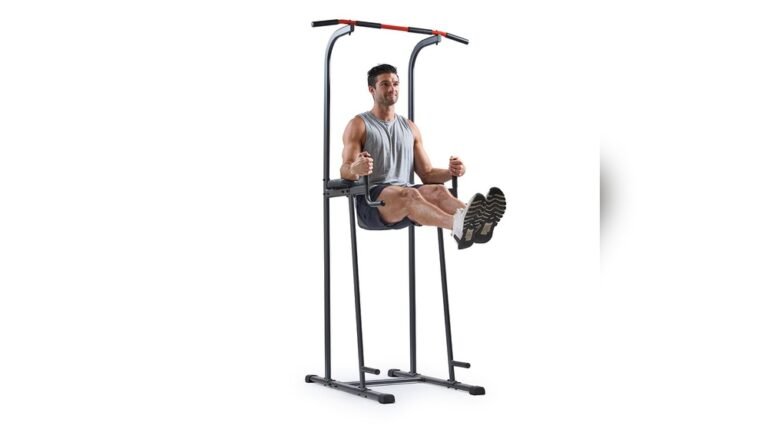
Setting up a dip station properly is essential for a safe and effective workout. A good setup helps you perform dips with the right form and avoid injuries. This guide covers key steps to prepare your dip station before you start training.
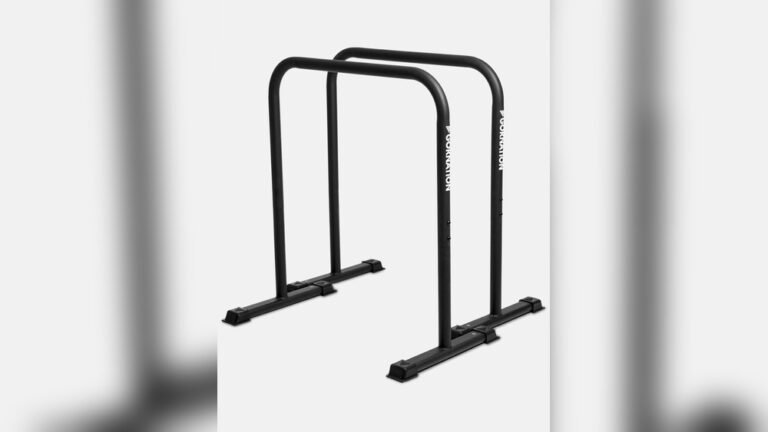
Choosing The Right Equipment
Select a dip station that fits your space and fitness level. Look for sturdy bars with a solid frame. The materials should support your body weight without wobbling. Adjustable stations offer more flexibility for different exercises. Consider a model with padded grips to protect your hands.
Adjusting Bar Height And Width
Set the bar height so your feet do not touch the ground when you hold the bars. This allows full range of motion during dips. Adjust the width between bars to match your shoulder width. Bars too wide or narrow can cause discomfort or strain. Proper adjustment improves your form and workout results.
Safety Checks Before Use
Inspect the dip station for any loose bolts or damaged parts. Make sure the bars are secure and do not move. Check the floor area for obstacles or slippery surfaces. Clean the grips to prevent slipping. Always test the station by applying light pressure before starting your workout.
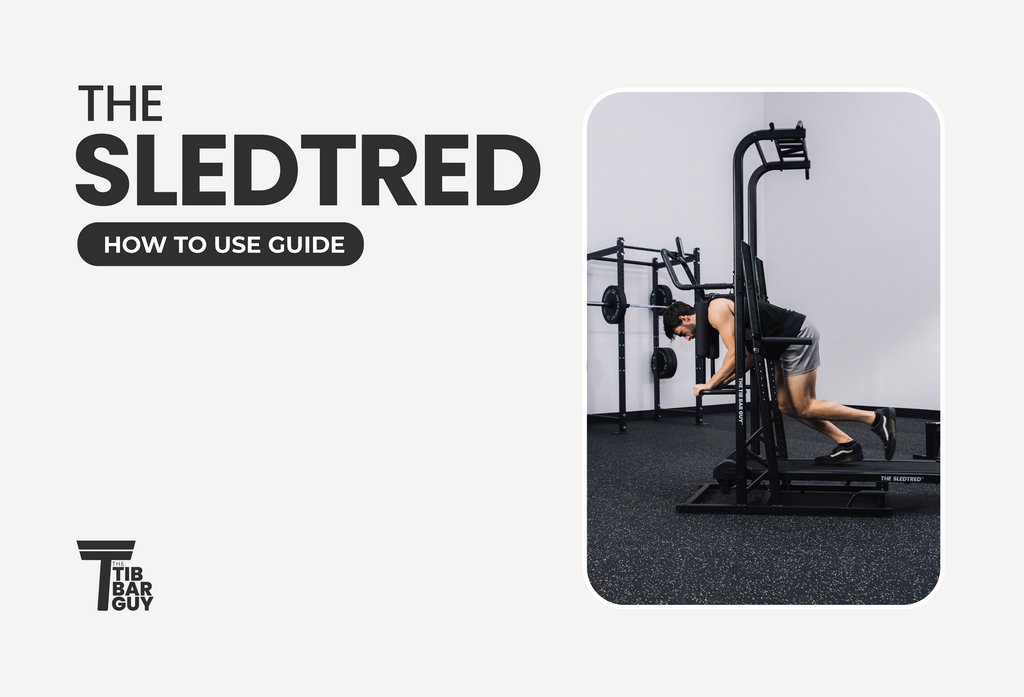
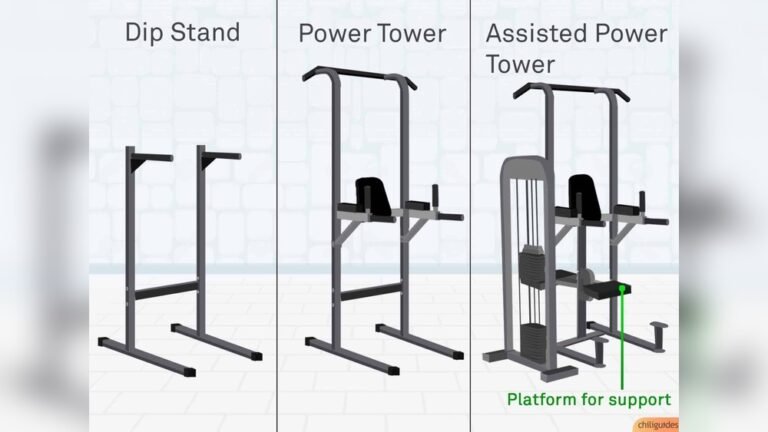
Credit: thetibbarguy.com
Basic Dip Techniques
The dip station is a powerful tool for building upper body strength. Basic dip techniques help target the chest, shoulders, and triceps effectively. Proper technique reduces injury risk and improves results. Below are simple steps to perform dips correctly.
Starting Position
Hold the dip bars firmly with your palms facing inward. Keep your arms straight and shoulders down. Cross your ankles behind you to stabilize your body. Engage your core to maintain balance. Your body should hang straight without swinging.
Proper Form And Movement
Slowly lower your body by bending your elbows. Keep your elbows close to your sides. Lower until your upper arms are parallel to the floor. Push through your palms to lift your body back up. Avoid locking your elbows at the top. Maintain a controlled and smooth movement throughout.
Breathing Tips
Inhale deeply as you lower your body down. Exhale fully while pushing yourself back up. Keep your breathing steady and rhythmic. Do not hold your breath during the exercise. Proper breathing supports muscle engagement and stamina.
Assisted Dip Variations
Assisted dip variations help beginners and those building strength perform dips safely. These techniques reduce the weight you lift, making dips more accessible. They improve form and build confidence before progressing to full bodyweight dips. Using assistance allows gradual strength development in your chest, triceps, and shoulders.
Using Resistance Bands
Resistance bands provide flexible support during dips. Loop a band around the dip bars and place your knees or feet inside it. The band lifts part of your body weight, easing the dip motion. Bands come in different thicknesses, so choose one that suits your strength level. This method helps you practice proper form while gaining muscle strength.
Assisted Dip Machines
Assisted dip machines use counterweights to reduce the load on your arms. Set the machine’s weight to support some of your body weight. Step onto the platform and grip the handles firmly. Lower yourself slowly, then push back up using your chest and triceps. These machines guide your movement, making dips safer and easier to perform.
Negative Dips For Beginners
Negative dips focus on the lowering phase of the exercise. Use a step or jump to get to the top position of a dip. Slowly lower your body down with control, taking about 3 to 5 seconds. Negative dips build strength by targeting muscles during the eccentric motion. This technique prepares you for full dips by improving muscle endurance and control.
Advanced Dip Workouts
Advanced dip workouts help increase strength and muscle size. They challenge your muscles more than basic dips. These workouts target your chest, triceps, and shoulders. They improve endurance and add variety to your routine.
Try these advanced dip exercises to push your limits. Each type focuses on different muscle groups and builds control. Use proper form and take rest between sets. This approach reduces injury risk and boosts results.
Weighted Dips
Weighted dips add extra resistance to your body weight. You can use a dip belt with plates or a weighted vest. This increases muscle effort and growth. Start with light weights and increase gradually. Maintain good form to protect your shoulders and elbows.
Ring Dips
Ring dips use gymnastic rings instead of bars. Rings create an unstable surface that forces your muscles to work harder. This improves balance and joint stability. Keep your body tight and lower yourself slowly. Ring dips enhance strength and coordination.
Slow Tempo Dips
Slow tempo dips focus on controlled movement. Lower your body slowly for 3 to 5 seconds. Pause briefly at the bottom position. Push up with steady force. This method increases time under tension and muscle activation. Slow tempo dips improve strength and muscle control.
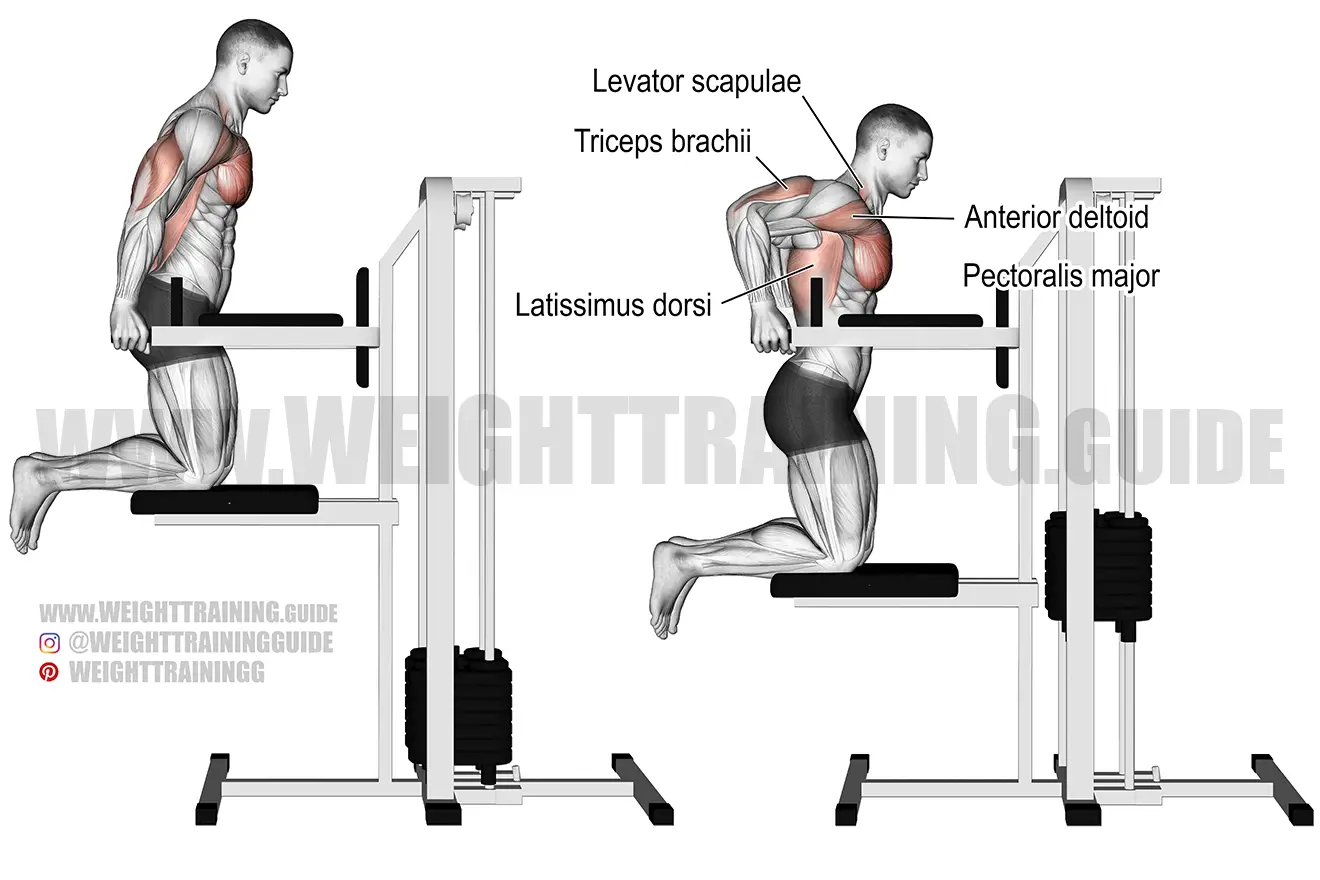
Targeted Muscle Focus
The dip station is a versatile tool for strengthening the upper body. It targets key muscles like the chest, triceps, and shoulders. By adjusting your body position, you can focus on different muscle groups. This section explains how to perform dips to emphasize each area effectively.
Chest-focused Dips
To target the chest, lean your torso slightly forward during the dip. Keep your elbows flared out to the sides. Lower your body until your shoulders are below your elbows. This form places more stress on the pectoral muscles. Perform the movement slowly to maximize chest activation.
Triceps-focused Dips
Stay upright with your body straight to engage the triceps more. Keep your elbows close to your sides throughout the dip. Lower yourself until your upper arms are parallel to the ground. This posture shifts the workload to your triceps muscles. Controlled motion helps build triceps strength efficiently.
Shoulder Engagement
Shoulders work as stabilizers during all dip variations. To increase shoulder activation, maintain a steady pace and avoid swinging. Focus on squeezing your shoulder blades together. Keep your shoulders down and away from your ears. Proper shoulder control reduces injury risk and builds endurance.
Common Mistakes To Avoid
Using a dip station effectively requires attention to detail. Many beginners make common mistakes that reduce results and increase injury risk. Avoid these errors to get stronger and stay safe. Focus on form, control, and recovery for best progress.
Incorrect Elbow Position
Keeping elbows too wide strains your shoulders. This can cause pain and injury. Keep elbows close to your body during dips. This position targets the triceps and chest safely. Avoid flaring elbows out to protect shoulder joints.
Poor Range Of Motion
Stopping too high limits muscle activation. Go low enough to feel a stretch in your chest. But do not go too deep to avoid shoulder strain. Full range of motion builds strength and muscle evenly. Controlled movement helps prevent injuries.
Overtraining Risks
Doing dips every day without rest harms recovery. Muscles need time to grow and repair. Overtraining causes pain, weakness, and plateaus. Include rest days and vary your workouts. Listen to your body and avoid pushing through sharp pain.
Benefits Of Regular Dips
Performing dips regularly on a dip station offers many health and fitness benefits. This exercise targets multiple upper body muscles and improves physical performance. Consistent practice helps build muscle, improve posture, and increase endurance. These advantages contribute to a stronger, healthier body.
Muscle Growth And Strength
Dips work the chest, shoulders, and triceps effectively. This leads to increased muscle size and strength. The movement challenges muscles to grow by adding resistance. Over time, this builds a powerful upper body. Strong muscles help with daily tasks and other workouts.
Improved Posture
Dips engage muscles that support good posture. The exercise strengthens the back and shoulder muscles. This support helps keep the spine aligned. Better posture reduces the risk of back pain and injury. A strong upper body helps you stand tall and confident.
Enhanced Endurance
Regular dips improve muscle endurance in the upper body. This means muscles can work longer without getting tired. Enhanced endurance benefits sports and physical activities. It also helps with everyday movements that need strength. Consistent training builds stamina and resilience.
Injury Prevention Tips
Preventing injuries during dip station workouts is essential for long-term progress. Following safety tips protects your muscles and joints. It also keeps your training consistent and effective.
Proper Warm-up Routines
Start each session with a warm-up to increase blood flow. Do light cardio or arm circles for 5 to 10 minutes. Include dynamic stretches focusing on shoulders, chest, and triceps. This prepares your muscles and reduces injury risk.
Rest And Recovery
Rest days help muscles heal and grow stronger. Avoid training dips every day to prevent overuse injuries. Use rest periods between sets to recover. Sleep well to support muscle repair and energy restoration.
Listening To Your Body
Pay attention to pain or discomfort during dips. Stop if you feel sharp or unusual pain. Mild soreness is normal, but persistent pain is a warning. Adjust your form or reduce intensity to avoid injury.
Dip Station Routine Ideas
The dip station is a simple tool that builds upper body strength. It targets the chest, triceps, and shoulders. Using it regularly improves muscle tone and endurance. To get the best results, follow a routine that matches your fitness level. Choose from beginner, intermediate, or advanced workouts. Each plan helps you progress safely and effectively.
Try these dip station routine ideas to keep your training fresh. They add variety and help avoid plateaus. Focus on form and controlled movement for the best gains. Rest days are important to prevent injury and muscle fatigue.
Beginner Workouts
Start with assisted dips or negative dips to build strength. Do 3 sets of 5 to 8 reps. Rest for 60 to 90 seconds between sets. Use a resistance band or dip machine for support. Keep your body upright and elbows close to your sides. This helps protect your shoulders. Aim to train 2 to 3 times a week for steady progress.
Intermediate Plans
Move to full bodyweight dips with good control. Perform 3 to 4 sets of 8 to 12 reps. Add pauses at the bottom to increase time under tension. Include variations like straight bar dips or slow negatives. Train every other day to allow muscle recovery. Combine dips with push-ups and planks for balanced upper body strength.
Advanced Training Programs
Use weighted dips to increase resistance and muscle growth. Try 4 to 5 sets of 10 to 15 reps. Add a dip belt or weighted vest for extra load. Mix in explosive dips or ring dips to challenge stability. Focus on perfect form to avoid shoulder strain. Schedule 3 to 4 sessions per week with proper rest days. Track progress and adjust weight or reps regularly.
Credit: weighttraining.guide
Incorporating Dips Into Your Fitness
Incorporating dips into your fitness routine enhances upper body strength quickly. This exercise targets your chest, triceps, and shoulders effectively. Using a dip station allows controlled, safe movements and supports proper form. Dips alone build muscle, but combining them with other exercises creates a balanced workout. Below are ways to include dips in your fitness plan for better results.
Combining With Pull-ups
Pair dips with pull-ups for a strong upper body workout. Pull-ups focus on your back and biceps, complementing dips’ chest and triceps focus. Alternating between these exercises balances muscle development. This combination improves muscle symmetry and overall strength. Try sets of dips followed by pull-ups to maximize your routine.
Full Upper Body Circuits
Create circuits using dips, push-ups, rows, and shoulder presses. Circuits keep your heart rate up and build endurance. Move quickly from one exercise to another with little rest. This method tones muscles and burns calories at the same time. Including dips in circuits targets the upper body thoroughly and efficiently.
Calisthenics Integration
Integrate dips into your calisthenics workouts for bodyweight strength gains. Use dips alongside exercises like muscle-ups, leg raises, and handstands. This variety improves muscle control and coordination. Dips add depth to calisthenics by focusing on pushing muscles. Regular practice increases muscle size and functional strength.
Frequently Asked Questions
How To Use The Dip Station?
Grip the parallel bars firmly. Lift your body by straightening arms. Lower slowly until elbows reach 90 degrees. Push back up to start. Repeat for desired reps. Keep core tight and shoulders down to avoid injury.
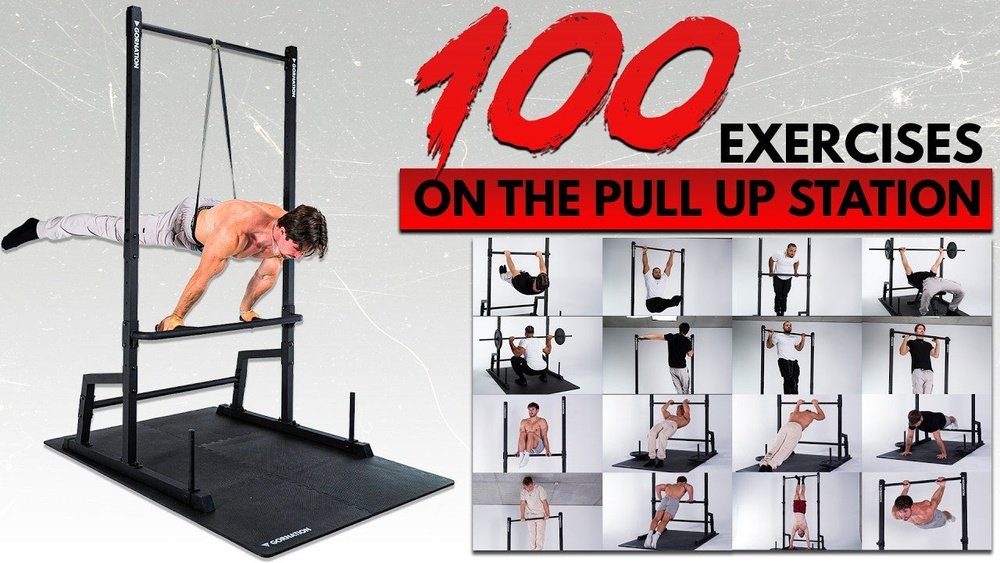
What Happens If I Do 100 Dips Everyday?
Doing 100 dips daily builds chest, triceps, and shoulder strength. It improves muscle tone and endurance but may cause overuse injuries without rest. Vary routines and maintain proper form to avoid strain and plateaus.
What Are Common Dip Mistakes?
Common dip mistakes include flaring elbows wide, leaning too far forward, incomplete range of motion, neglecting shoulder stability, and using uneven grip placement.
How To Use A Dip Bar For Beginners?
Start by gripping the dip bars firmly with straight arms. Lower your body slowly by bending elbows to 90 degrees. Push back up to the starting position. Keep shoulders down and elbows close to your body. Begin with assisted dips or feet on the floor for support.
Conclusion
Using the dip station regularly builds strong chest, shoulders, and triceps. Keep your form correct to avoid shoulder strain and injury. Rest days help muscles recover and grow stronger. Change your routine to prevent plateaus and stay motivated. Focus on controlled movements for better results.
This simple exercise improves upper body strength and posture. Start slow, listen to your body, and increase intensity over time. The dip station is a practical tool for fitness at home or gym. Consistency and care bring the best benefits.
I am a certified fitness coach with over 10 years of experience helping people improve their strength, endurance, and overall health. Specializes in workout programming, weight training, fat loss, muscle building, home fitness, and evidence-based nutrition.My goal is to make fitness simple and practical through well-researched guides, honest product reviews, and actionable training advice.